***Wear safety glasses while working with chemistry
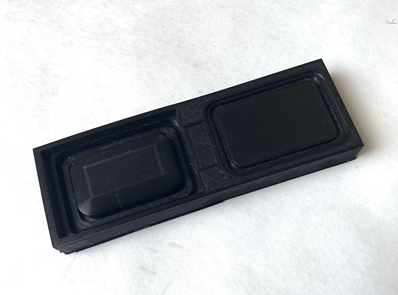
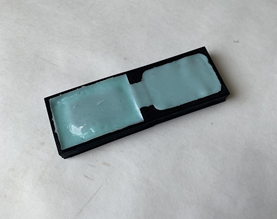
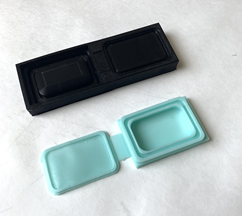
This is a child-proof mint container with a silicone insert. We are going to duplicate it by 3D printing the hard parts and 3D printing a mold so that we can cast the soft insert in silicone.
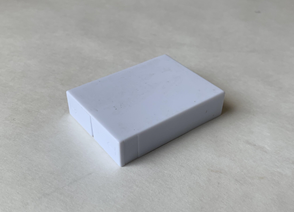
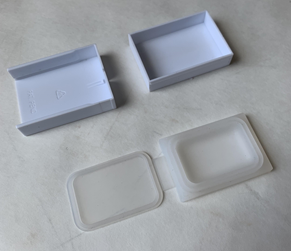
The outer part is in two shells that slide together and lock in place.
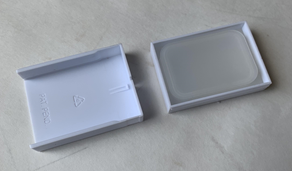
The soft silicone insert fits in the bottom shell and has its own lid flap.
We begin by measuring the silicone insert with calipers, we will make a one part mold because the bottom of the insert is totally flat, this way the bottom will become the top when we cast the silicone.
After taking measurements, we model a replica of the insert, this was done in Tinkercad, a free web based CAD software created by Autodesk. Tinkercad is great for quick projects that are low detail and are meant to be 3D printed. It works mainly by Boolean operations where a 3D virtual shape, or a primitive, is combined with or subtracted from another primitive. Most of this was done by taking primitives and adjusting them to the measured dimensions of the physical object and using boolean additions. Once we have a complete replica of the silicone insert we make it into a “hole” object which sets it up to make a Boolean subtraction from another object. In this case the other object will be a simple rectangle that the insert can fit in without too much extra space.
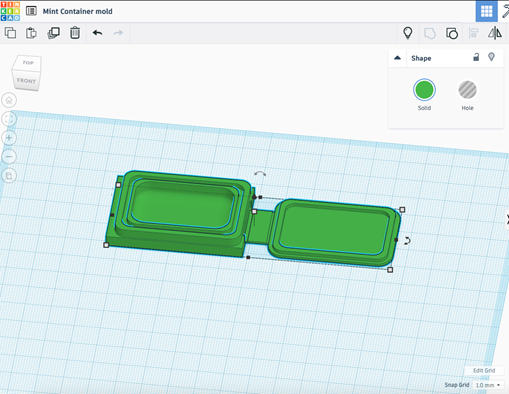
We combine the hole object and the block to make our mold.
We then export our file to Cura and set up the 3D printer to print at the finest detail possible, this is because many of the parts of the object are very thin. Our settings will be 0.06 layer height with the 0.4mm print head. We are printing in PLA
We spray a release material into the 3D printed mold, Ease Release 200 is preferred for silicones. We then mix the silicone according to the directions of the material, usually it is an A B mixture of equal parts by weight or volume. Make sure to scrap the sides of the mixing container and bottom to ensure proper mixing. You should mix for at least 3 minutes. We then place the mixing container in the vacuum degasser.
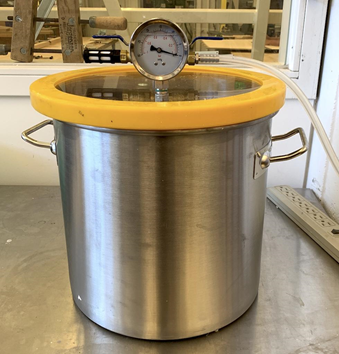
Follow the instructions for the vacuum degasser. To properly degass the silicone. Then repressurize the chamber and pour the silicone into the mold. Pour carefully allowing a thin stream to enter the mold slowly. If your mold is small enough to fit in the chamber you can degass the silicone again to remove any remaining bubbles. Be careful as this can cause the silicone to overflow from the mold. To avoid this, do not vacuum all the way to 29 psi. Try something lower like 10-15psi. This will be enough to allow the bubbles to slowly come out of the silicone before it cures.
Be careful when demolding as this piece has very thin fragile parts. Starting with one corner begin pulling at the silicone, you are trying to break the suction that is formed by the silicone and mold so it is best to pull slowly and gently. Move to another corner and try the same movement until you are able to demold the silicone.
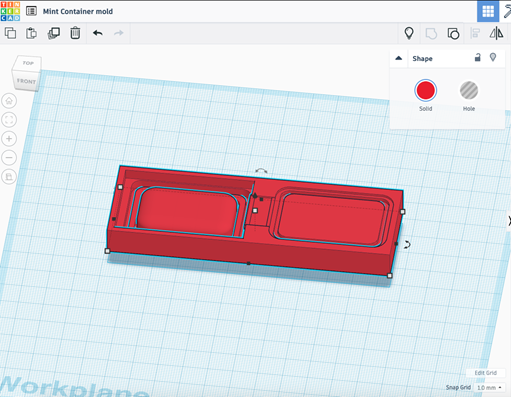
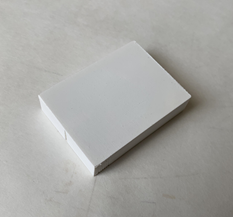
The hard case for the container is modeled in a similar fashion to the mold, although the 3D print will become the actual case so we will not need to invert anything to make a negative for casting. We will use calipers to measure the existing case and use those measurements to model the case in Tinkercad.

We will then 3D print the case in two parts. We are using a .4 print head and printing at .06 layer height which is the finest detail we can print at. This is because the details of the print are very small. If we wanted to print at even finer detail and not have ridges on our print we could use an SLA printer instead of the FDM printer(Ultimakers).
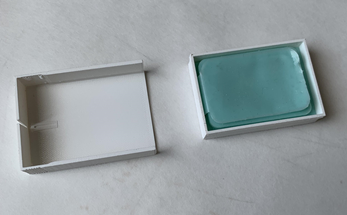

Once you have made your first mold, you can make an infinite number! Here is the same silicone mold used to make a higher quality interior case similar to the original. You can also modify aspects of the original to improve or creatively enhance the forms as long as they do not interfere with the functional aspects of the case. Good luck!