1. Create a new Illustrator file
- File > New…
- Orientation = Landscape
- Units = Inches
- Width = 48 in.
- Height = 24 in.
- Advanced > Color Mode = RGB
- Raster Effects = Screen (72 ppi)
- Your life will be much easier if you use the template.
2. Design your file for the laser
The laser cutter can perform 3 basic operations:
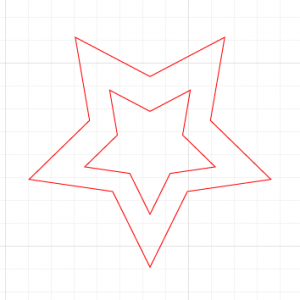
vector cutting:

Use a transparent fill and red stroke (R = 255, G = 0, B = 0) when you want to cut all the way through your material. Make sure the stroke is set to 0.001″
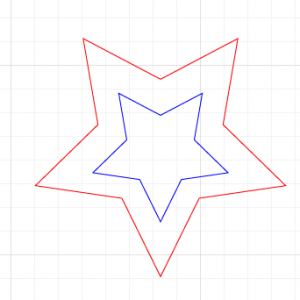
vector engraving:

Use a transparent fill and blue stroke (R = 0, G = 0, B = 255) when you want to incise shallow vector lines into your material. Make sure the stroke is set to 0.001″
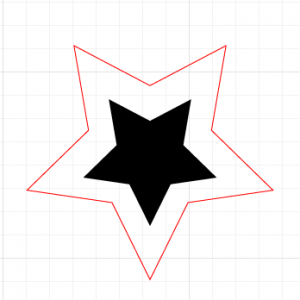
raster etching:

Use a black fill and transparent stroke (R = 0, G = 0, B = 0) when you want to etch a raster image.
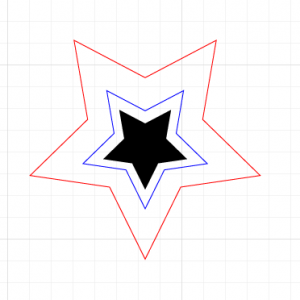
Of course, you can combine all of these operations in one design:

For guidelines on how to design a piece which fits together, please see Working with Kerf.
3. Before you submit your file
-
- For fastest turnaround, check the following before you submit your file.
- Make sure all strokes are 0.001 inches.
- Make sure your document is in RGB Color Mode (File > Document Color Mode…)
- Make sure there are no transparencies (Opacity = 100%)
- Stroke all brush paths and create a black fill for the outlines.
- Avoid using clipping paths, they are unpredictable.
- Outline all fonts (Type > Create Outlines)
- Uncheck PDF compatibility when saving.
- Make sure scaling is set to “Do not scale” in File->Print options. We will cut your file with the scaling you specify.
- Keep the art board at 48 x 24 inches, even if your material is smaller. You should make objects to represent your material and position them near the upper left of the art board.
- If your job is complex or confusing, it never hurts to include a diagram, photo, or sketch of the assembled design for reference.
- Leave a minimum of 0.125″ of space between your artwork and edge of the art board. We cannot cut on the edge or from edge to edge of the material.
4. Submitting your file & picking up your completed job
- Fill out a laser request form, also available on the 4th Floor.
- Drop your material off in the fablab or in the laser room in the fab lab. Label each piece with it’s associated file name.
- Email your file(s) to <fablab@arts.ucla.edu> with the Subject: “Laser Cutter Job”
- You will be emailed when your file is ready. You can pick it up in the Pick Up area at the Print Lab on the fourth floor of Broad Art Center.
