***Wear safety glasses while working with chemistry
When working with silicones and other mold rubbers it is useful to vacuum degas the material to remove bubbles. If your mold or object sets with bubbles in it, it will not be as strong. Vacuum degassing is a simple process that involves placing your mixed mold rubber into the vacuum chamber and removing depressurizing the chamber with a vacuum.
Here is how to do it:
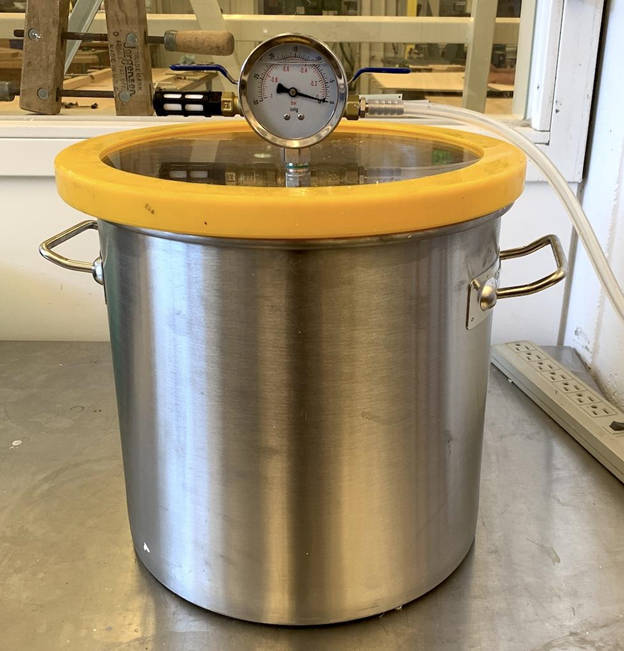
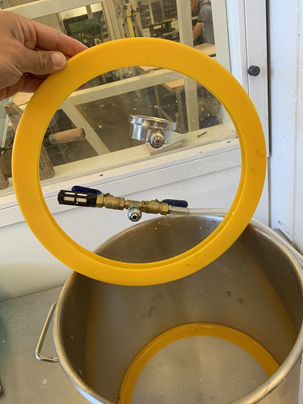
1. Check the vacuum degassing chamber, make sure the rubber gasket is clean, any residue or solids stuck the gasket will cause air leaks.
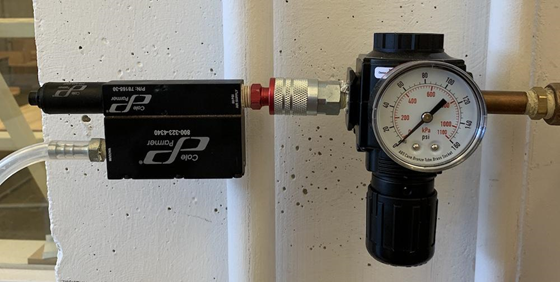
2. Examine the connection to the compressed air line. The pressure gauge should read 0 psi. The vacuuming component should be connected to the quick release portion of the pressure gauge.
3. Mix your material, either a two part silicone, urethane, resin or some other liquid material that could need degassing. Make sure your mixing container is large enough to allow for the liquid material to rise without overflowing, usually double the volume of your material is sufficient.
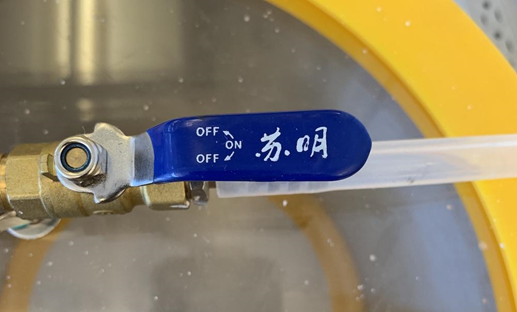
4. Place the mixing container in the chamber and place the lid on, make sure the lid is evenly centered to prevent air leaks. The valves in the lid should be in the closed position.
5. Open the valve to the main compressed air line by turning the white handle 90 degrees to the left. You will see the pressure gauge reach 80 psi and the vacuum component will make a loud hissing noise, this is normal. 80psi is the optimal pressure to vacuum.
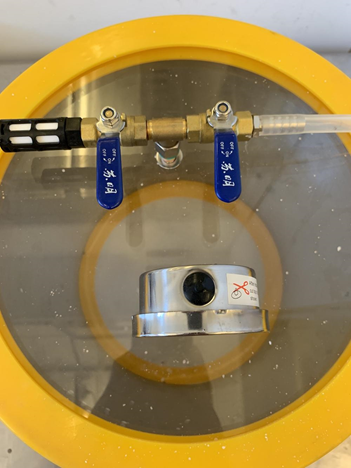
6. Open the right valve on the lid that is connected to the vacuum component.
7. You will see the vacuum gauge on the vacuum chamber lid begin to increase. It will take 2-3 minutes to reach 29 psi. Your material will begin to rise and at the point it begins looking like it is boiling it will fall. Start a timer for 90 seconds once the material falls. When the timer is done close the lid valve and stop the vacuum by closing the main compressor valve.
8. Slowly, incrementally open the left lid valve which will return the chamber back to normal. Do not open the valve all the way too quickly or this could result in your material splattering all over the inside of the chamber.
9. Once the vacuum gauge reads 0 psi, remove the lid from the vacuum chamber and remove your mixing container from the chamber.
10. Place the lid back on the chamber and return all valves to the closed position.