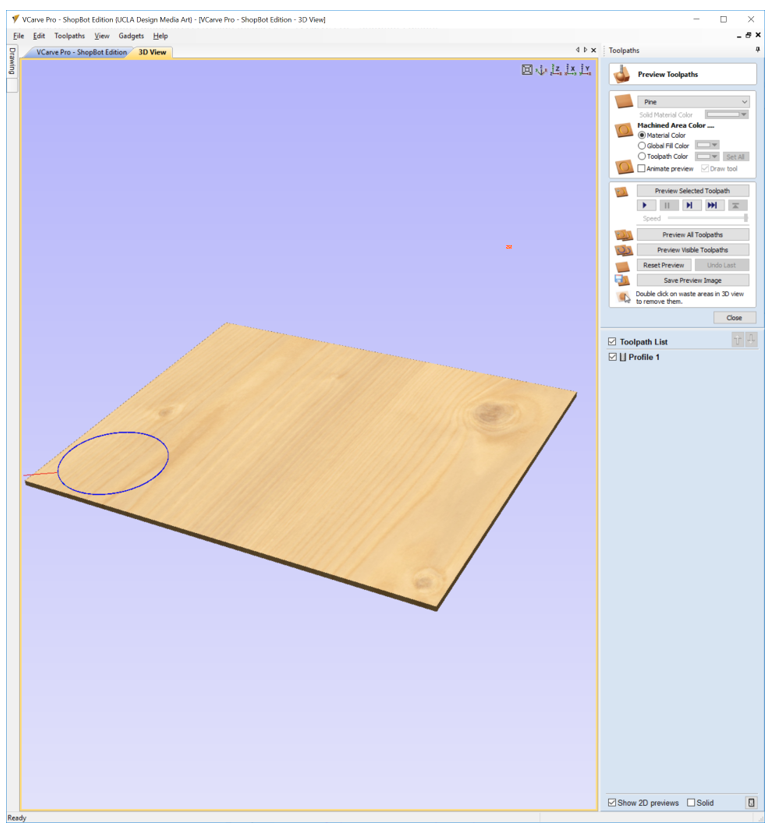
This example is of a 2D Profile Toolpath
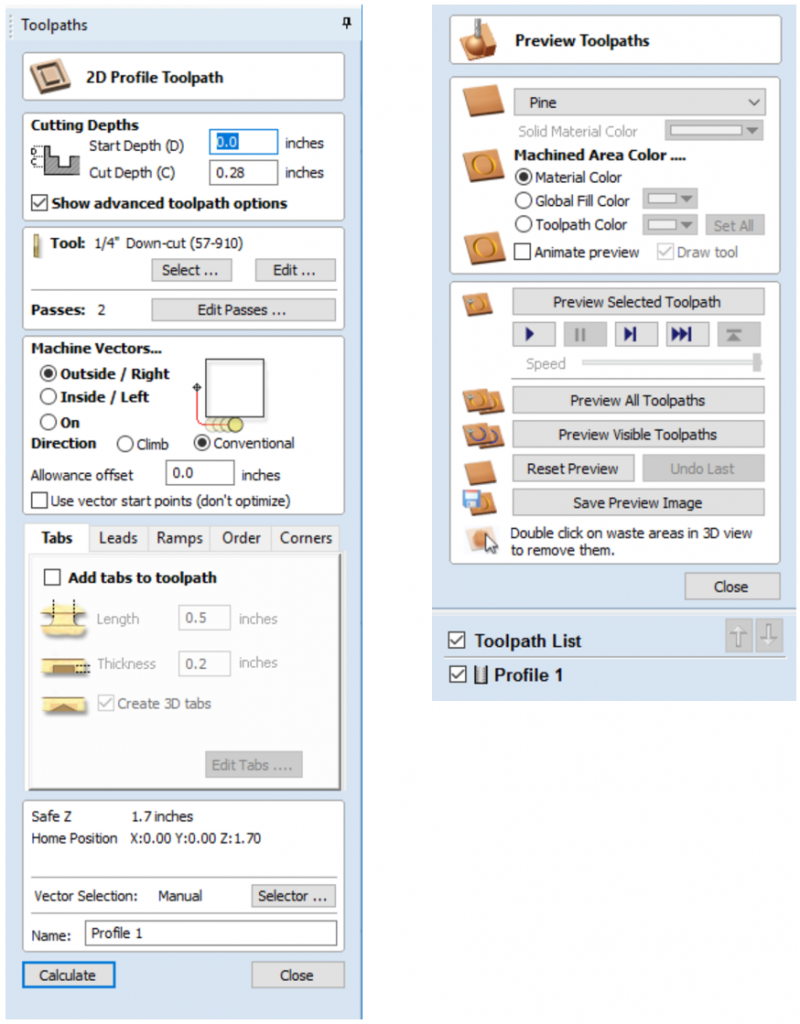
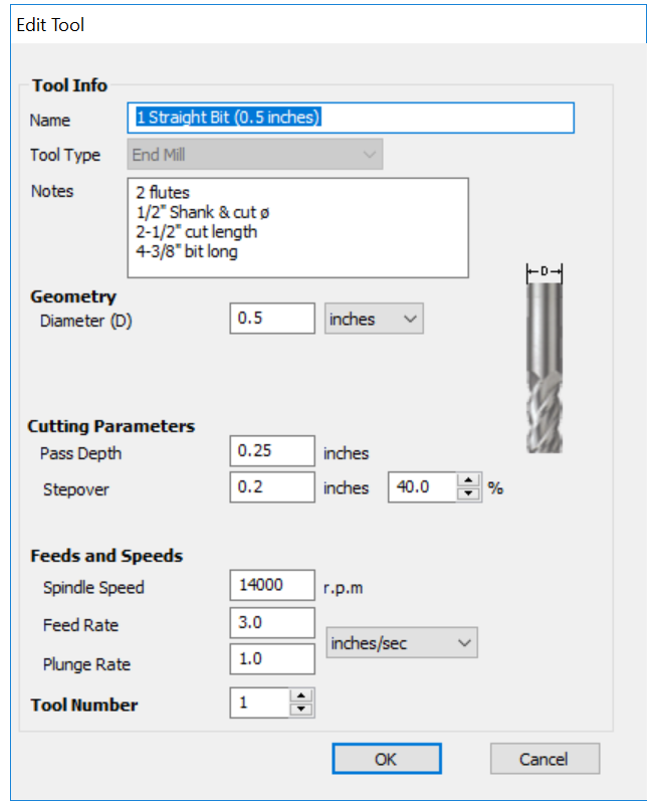
(1) When you click “Select…” in the Tool section, the tool database will show up. You can add your bit here or select one that Fablab has. Click on the FABLAB folder on the left to see the list.
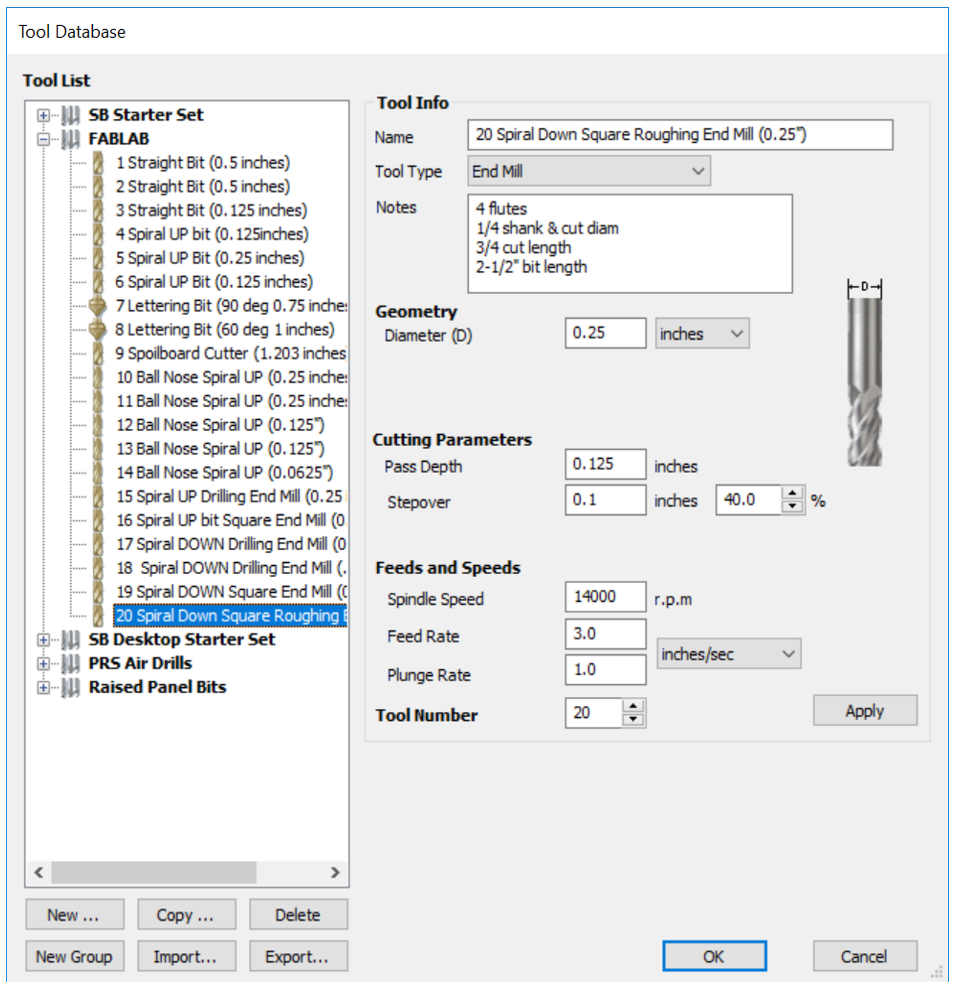
(2) After select the bit, in the “Edit…” feature you can change how you want the machine to operate. This will not apply into the main catalog of bit in the FABLAB folder.
(3) Once you have chosen the type of cut, added tabs, set the ramp, and chosen the tool, give the cutting path a name under “Name: ”. You should include the type of cut and some description of the part, for example, “Inside profile desk leg small.”
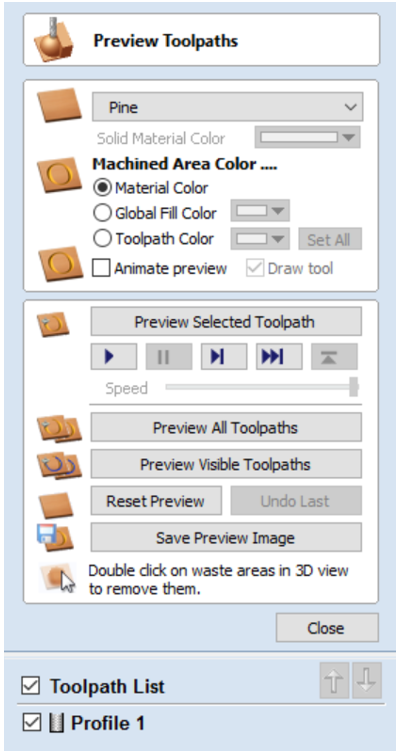
Now you can hit “Calculate”. The program will bring you to the 3D View tab and you will see how the cut look like in 3 dimension. If there is a warning says that your cut goes deeper than the material thickness, just click “ok” if you want to cut the shape out. In the 3D View, the red line represents the actual cut. The blue line represents the movement of the bit.
***If you make any changes to the toolpath, ever, you MUST hit Calculate or else VCarve will not update these changes and you will mess up your job.